
Okay guys, I freaking adore pumpkins and you all know that. ;) So I decided it was high time to redo my pumpkin nail art tutorial so that you all could make your own pumpkin nails and be extremely happy like me. xD Also, I did these pumpkins for O is for Orange Day but felt like I should do them again now that my nails are longer. :) So if you're interested in learning how to create your own adorable pumpkin nails for fall, keep reading!

I know in some places it's snowing (*cough cough here cough*) or even in some areas it's still super warm outside so it doesn't feel like fall, but let's face it; Thanksgiving is only in a few more weeks so get in the season with some pumpkins! <3 You're going to need orange and brown polish. I would also suggest having black and green if you want to add some more charm to your lil' pumpkins though! You'll see why below:
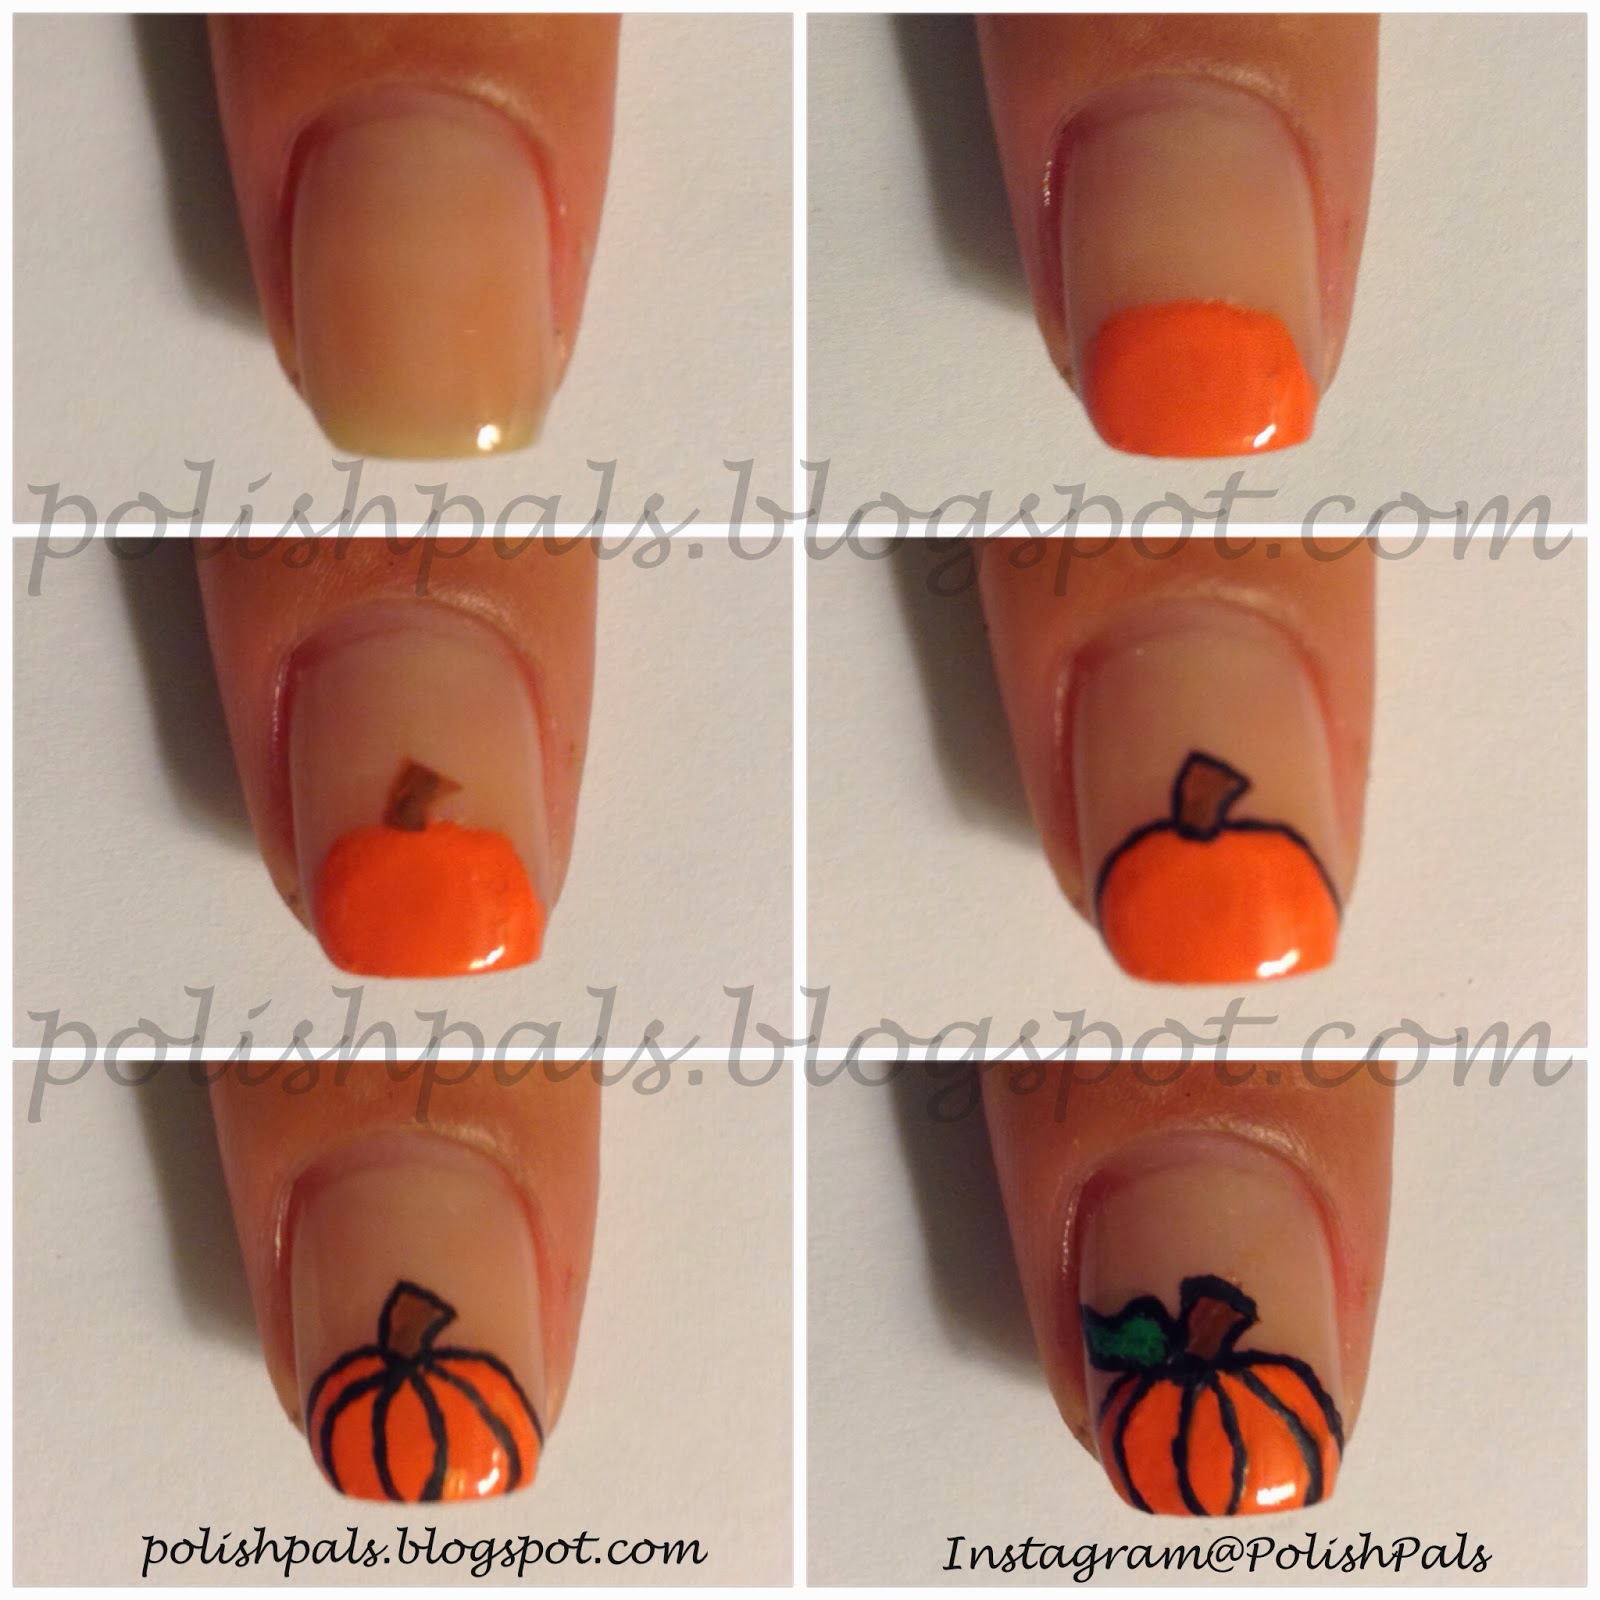
Pumpkin Nail Art Tutorial:
1. Start off with your base color. I like going nude for the background of pumpkins but any light color will work best. :) I am wearing 2 coats of Nina Ultra Pro French Pink.
2. Next jut draw a little mound of orange with your orange polish. I don't know how else to explain it -- but basically just only paint the bottom of your nail! This orange is Wet n Wild The Clock Strikes Orange.
3. Then, add a little brown stem to that pumpkin! If you're not good at "stem" shapes, go ahead and add just a chunky brown line sticking out of the top to constitute as your stem. xD I actually used brown acrylic paint for this because I didn't want to go find my brown nail polish baha. So, if you don't feel comfortable adding any lines to your pumpkin, you can stop here! But if you want to add a little more detail to your pumpkin, continue on. :)
4. I then traced my orange pumpkin and brown stem with black acrylic paint just for more definition in shape. Once again, if you're happy with the way it is NOW, feel free to stop at any time!!!
5. Now give those pumpkins some defining black lines as those "grooves".
6. And finally, if you're feeling up to it, finish your pumpkin off with a green leaf. :) And yes, the green is acrylic paint. I also later added little squiggly vines just for fun if you want to try that, knock yourself out! You now have the cutest little pumpkin nails EVER. :)

So you saw my first pumpkins from this season back in September and there is obvious improvement... xD Plus having slightly longer nails help a little. But these vines are my favorite part! <3

So right now these guys are shiny but I also made them matte with OPI's Matte Topcoat. Do you like them shiny...?

Or matte better? I think the shiny is cuter but the matte makes them look way more fall-like and vintage. xD I don't know... I almost always prefer shiny myself just because I'm like that haha.
Thank ya all for checking out my pumpkin nail art tutorial today! I hope to see some more pumpkin nails floating around. ;) And if you're wondering, I did create an old pumpkin tutorial but that was from last November. In fact, it's exactly and entire year ago (and a week!) ago when I did my first pumpkin nail tutorial... Oh sheesh.. If you want to check out my improvement, go ahead and click here but please don't make fun! I know it's waaaay back but we all had to start somewhere. :) Now back to swatching. xD Oh I'm so behind haha!
Your Polish Pal,
Jenna

I must do these for Thanksgiving! Adorable!
ReplyDelete