
Hey everyone! I am on a roll with blogging this week, eh? ;) Today I have for you decals by Nailed Kit. This is my first experience with water decals, so I decided I would make a tutorial on how to apply these nail art decals (specifically from Nailed Kit). :) This will be a lengthy post because of the tutorial (some people that have never tried water decals might want to learn how) but the review of this product will be at the very end of the post. ;) So keep reading for my final thoughts!
 |
| Nail Decals Provided By Nailed Kit |
And before we go any further, just take a look at this adorable packaging! <3 Okay, it was all wrapped up in white tissue paper before to make it even cuter but I simply love this little bow to tie the package all up. ;D


So I was sent a total of 3 different nail decal designs -- Bee Happy, Unicorn, and Cupcakes! They're all very cute but I'm going to be using the unicorn ones today. ;)
So let's begin this Nail Decal Tutorial!
You are going to need some warm water in a bowl (or a cup.. whatever you have on hand ;)), a pair of scissors, clear topcoat (which I forgot to photograph), and your water decals of course!
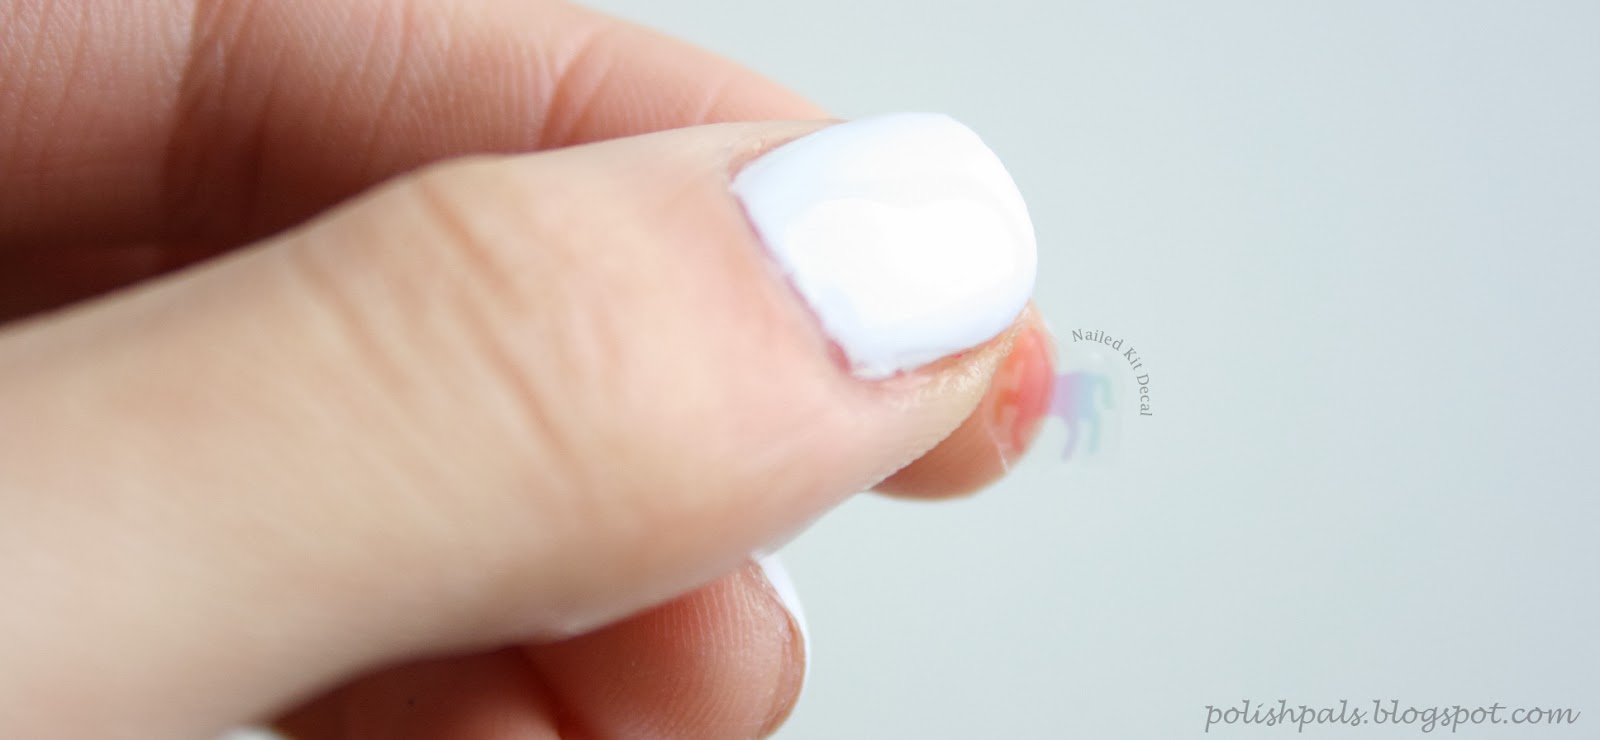
Here I am using the Unicorn Nailed Kit Decals. :)
So once you have gathered all your materials and chose your decals, go ahead and cut out your decal. I wanted the rainbow unicorn! ;D It's best if you cut as close to the image as possible so it'll fit on your nail.
Here is my little unicorn cut out!
Now place your decal in the warm water for a few seconds. You don't need to submerse them; just soak them long enough for the decal to slide off the white paper. It really only took about 10 seconds!
Taa-daah! Here is my little nail decal! As you can see, the white paper will come off and your decal will just be clear plastic with your cute design on it. It's time to place it onto your nail.
So I figured out that decals will work best with a solid light nail polish base. I tried with a crelly polish with glitter as a base but it just didn't look good because the decal was see through and showed the glitter underneath. That's why I think solid colors make the best base. :) Another thing when it comes to applying your nail decal, you want your base to be a little bit wet so that the decal will stick and stay on. So, this white nail polish was dry but I put a coat of clear topcoat on my ring finger and then gently placed the unicorn decal on top. Once I maneuvered the little guy to where I wanted it exactly, I sealed him in with one more clear topcoat!
And boom! You have a stinking adorable nail art manicure with NO artistic skills required. ;)
I used a variety of the nail decals from the Unicorn set on all my nails. :)
Hehe, this unicorn is adorable. :)
Final Thoughts:
Whoooo! Now that we have a step-by-step tutorial on how to apply decals, what did I think about them? Well, this was definitely my first time playing with decals and it take some practice getting used to them. They are not like stickers (there is no adhesive) so it can be difficult at first placing them onto your nail. That tip on making sure that your base is wet when sticking the decal on though really helps! I didn't try that method until like my last decal. *face palm* So these things are definitely going to take some practice getting used to! Oh, and when you are cutting the decals out, really do try to get as close to the design as possible. :) You want the entire design to fit on your nail!
Nailed Kit's Decals come in a set of 24 with a variety of designsfor $8. You'll get 8 decals in sizes large, medium, and small -- this is perfect for the majority of nail sizes. Nailed Kit also has fun kits that you can buy that have nail decals, nail polish strips, rhinestones, and other goodies for $14. But even better yet, you can buy these nail art kits for $14 too but get another set of decals for free! Yes, the value of this deal is $22. ;) This monthly kit can be bought one month at a time too which is fantastic.
Okay, now that we're ending our little review on the Nailed Kit, I just wanted to add some proud points of this company:
- Nailed Kit proudly source all of their components for their decals in the USA. They are made with love in San Francisco.
- The decals are non-toxic and cruelty-free.
- They have teamed up with some of the most talented designers and illustrators in the business to create their designs and they even give them a percentage of every sale to thank them for their hard work. How sweet! <3
- They only launched in September 2013 and believe that they're only getting started. ;)
So what do you say? Will you be trying out these fun decals? :) I think they're so cute and easy to use if you're looking for 'detailed nail art' but don't have the skills to paint them yourself yet. Find more about Nailed Kit on their website http://nailedkit.com/!
Your Polish Pal,
Jenna

What cute nail decals! I've tried some before and really like it for fast nail art. Never heard of this company so thanks for sharing letting me know about them. They sell some unique designs! Great review and tutorial too!
ReplyDeleteI love the unicorn waterdecal!
ReplyDeleteyour nails look great :)
Xx Julia
Thanks Jenna for the tutorial! I've seen people using nail decals all over instagram but never really looked into them/how to apply them... they look really easy to use and fun! :) Love the mani you created with them!
ReplyDelete