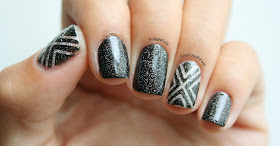
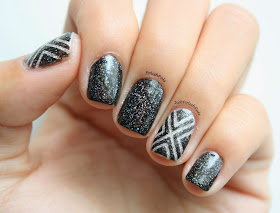
The most important skill to have when doing doing tape manicure is patience. There is a reason why you rarely see your Polish Pal doing tape manicures -- striping tape is insane. However, there has been a very popular criss-cross nail art design floating around that I just had to try. Sadly it does require striping tape for those perfectly crisp lines so that's why they make perfect accent nails. ;) Keep reading for my striping tape tutorial too!
I really, really, really love this criss-cross accent nail! You can do ANY color combo you want and this design would look fabulous. :) The polishes I used though are L.A. Girls Black Illusion and L.A. Girls 3D Silver. I thought about adding nail art studs or a glitter gradient but you know what? Simplicity needs to win sometimes. ;)
Okay, so here is my criss-cross nail art pictorial using striping tape. :) {You can purchase striping tape from the Born Pretty Store here -- my 10% off discount code is JZX31}
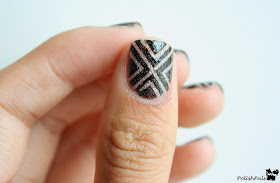
And let's end with thee thumb shot! :D
Your Polish Pal,
Jenna


What a nice striping tape design. It looks so detailed too!
ReplyDelete